Saturday, March 22, 2014

Spring is Here!

Man, did the groundhog get it right this year!  It’s been the longest six extra weeks of winter, EVER!  And I live in South Texas so I’m sure this sound like a HUGE understatement to all y’all Northerns.  However, I have finally seen signs of Spring around my house.  It’s finally time we can get our gardens ready.  I’m going to share with you how I created some Herb Seed Balls.  This little activity is the perfect way to kick off the new season! I am part of a local MOPs group (Mothers of Preschoolers) and I am in charge of Creative Activities for the group.  Probably not surprised about the position I chose, huh?  I thought this would be the perfect spring activity for our group.  We used herb seeds because who doesn’t like fresh herbs and they are easy to grow.  First, I had to try out this activity at home before potentially leading the masses into crafting mayhem.  Red Art Clay supplies Supplies you’ll need:
  • 4 cups Red Art Clay - (I purchased this from a local clay store.  Do not fret they do sell it in smaller amounts!)  My suggestion for finding some near you is to do a quick Google Search and see what pops up in your area.
  • 1 cup Organic Starter Mix – All the tutorials I read used garden mix.  This Organic Starter Mix is more like a potting soil.  I figured the little seeds needed all the help they could get since we live in a big sand pit.  So long story short, it will work with potting soil as well.
  • 2 cups Water
  • Seeds – I purchased herb seeds from High Mowing Seeds.  They have a great selection of organic seeds.  The best types of seeds for an activity like this would be herb, annuals or wildflowers.  If you want to do wildflower seed balls save this activity for the Fall.  
  • Bucket to mix all the ingredients.
  • Cookie Sheet to dry the seed balls.
  • Gloves to keep those manicures in check.
  • Bonus item – Medium Scoop – I’m all about the handy helper tools!
Now, let’s get dirty!  Mix your Red Art Clay, Soil, and seeds.  Mix well before adding water.  Add water SLOWLY!  You are trying to create a sticky clay-like mixture, not too soupy.  You are looking for the consistency of cookie dough.  If its too watery, just a little more Red Art Clay until you get. mixture Now grab your scoop and start scooping.  This will make about 5 dozen seed balls.  image Once you have them all scooped out they need to air dry COMPLETELY!  It took these try about 2 full days to dry however it could take up to 4 days.  If they don’t dry completely they could start germinating before you are ready.  When they are dry its time to “plant” them.  Literally throw them in your garden beds and keep watered.  Its that easy!  Soon enough you’ll really have something to smile about. plants


Thursday, February 20, 2014

Kenzie's Dress Party Blog Tour

blogt

BLOG TOUR DATES:

2/18 bebelambs
 
Calling all Mamas, Sisters, and Girlfriends!  If you are a fabric hoardin’, seam rippin’, self-proclaimed Fashionista and you have a little girl in your life, then have I a dress pattern for you!

Recently, I learned that I would be a part of Kenzie's Party Dress Blog Tour put on by 
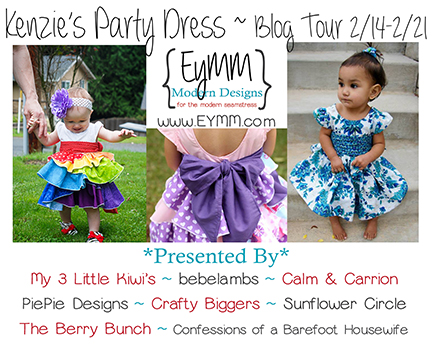
Everything Your Mamma Made & More.  I was beyond excited!

Prior to knowing about the Blog Tour, I found the perfect spring fabric.  I wanted to use and make each of my girls an Easter dress.  Heather Bailey’s Lottie Da Fabric Line was too perfect not to get. 
IMG_0349
Doesn’t it just say SPRING?!?!  Shortly after it arrived, I found the perfect dress pattern, Kenzie’s Party Dress.  This pattern had plenty of options to mix up the style so each of my girls could have their own look, while still coordinating.  It has 2 skirt options for the dress pattern, 2 sleeve options, options for high-waisted skirts, and a doll pattern as well.  The options are endless! 
I quickly realized that I did not have enough fabric to create E’s Signature Dress so I went online and purchased more. 
(I buy most my fabric online.  I consider going to a nice fabric store like sipping a nice glass of wine.  Neither should be done with small children around.  It doesn’t go down as smoothly.)
While that was being shipped my way, I started cutting and sewing C’s dress.  I was making her the Simple Skirt Dress with sleeves.  I made a few embellishments to this pattern by cutting the skirt selvedge to selvedge for a little bit more ruffle and adding ruffle fabric to the bottom.  I never used ruffle fabric before and I’M IN LOVE WITH IT!  Its so easy to work with and adds so much.
 
 
Then, I learned that while I’m sitting at home in South Texas sewing and watching Mickey Mouse Clubhouse apparently the rest of the country is having serious weather issues.  Eeeeek!  My fabric for E’s dress still hadn’t shipped, so time for Plan B!  I rounded up the fabric I had left and went digging through my stash to find something that would work.
 
 
Thankfully I raided my mom’s fabric stash a few years ago, so I had this nice purple woven just waiting for the right project.  Folks, you are looking at circa 1980s Cotton/Rayon blend.  It was perfect for the Signature Skirt Dress.
 
 
There was only enough to create two of the three layers of this dress.  So we ended up with a tunic style party dress.  I couldn’t be more happy with the results.  The look was perfect for her.
 
 
This dress pattern fit each girls personality perfectly!  As soon as I had them both dressed and outside to take a few pictures, I could tell they loved them too.  
 
 
I whipped up the headbands using a scrap piece of the ruffle fabric.  Super easy!!!  I just cut the strip of fabric to size and tied in a knot.  I feel like I cheated it was so simple, but I like the look it added to the outfits.  I added a fabric flower to E’s.
 
 
When I made the fabric flower to go on C’s headband she let me know that was a no-go, so I clipped it to her sash.  I actually really like it there.  Just something a little different.  Maybe she has more fashion sense at age 2 then I do!?!?  
 
 
Small confession, these were my first fitted bodice dresses to ever make.  I admit that they did have challenging moments and I might have had a few flashbacks of my love for Flying Geese during my quilting classes.  (Inserted sarcasm.)  I must say that the end results were completely worth it. 
 
 
Kenzie’s Party Dress was well written, helpful where it needed to be, and I loved the color coded pattern print outs.  If you own a sewing machine and know basic sewing techniques, then you must give this pattern a try.  You can do it!
 
Need a little extra incentive to give this dress a try?  EYMM has this dress on sale until 2/24.  Just use the code “kpdblogtour” on a Kenzie’s Party Dress order of $8.95 or more from www.eymm.com & get $1.95 off.  This makes individual patterns just $7 & the bundle with both size ranges AND the bonus doll add on just $12.47.
 
I feel like this Blog Tour has been one great Dress Party!  I have seen some amazing dresses made with some beautiful fabrics.  I feel so fortunate to be apart of this experience. Thank you Jessica B. for pushing me to apply for this blog tour.  Thank you Kymy  for allowing me to be apart of your blog tour! 
 
Completely worth every stitch.


Tuesday, February 11, 2014

Home, Home on the Range

 
The last two weeks of January the girls and I spent some time at my parent's house. All because it's one of the best times of the year.... Fort Worth Stock Show time!
 
The girls and I jumped in and helped out where we could.
 
First we welcomed the Newbies to the ranch.  Isn’t he a cutie?

 
Got the minerals ready to put out in the pastures.  (I know, I know, the outfit is a Hot Mess!)
 
Drove tractors…..
 
We also saw gray, wet skies for too many days!  I think the cows were wondering how do they get inside to stand by the fire too? 
 
 While most of the time was spent eating, breathing, and sleeping cows, I did manage to craft a little too.  My mom busted out her Bernina. 
***Sidenote – No, I didn’t learn to sew from my mother.  She’ll tell you that the “Sewing Gene” skipped her and went straight to me.  Bless her heart.  Frankly, she’s too hard on herself.  I’ve taught her to sew two quilts while patiently waiting on both my girls to arrive.  I thought she did great!
Back to my story though, I learned something on this sewing adventure, Mom said that she bought this beauty over 30 years ago for $1000!  I nearly choked.  If I had to spend that much on my first sewing machine (Janome DC2010), I’m not sure I’d be sewing at all!  I’d probably still be sitting in the dirt somewhere playing with plants.
Here she is, no, not my mom, silly…….
 
And here was our mission.  Feed bags, yes, you’ve probably seen this craft before but aren’t these bags just begging to be so much more? 
 
Mom has a Master Gardeners seminar coming up and the group wanted to sell some items to help raise some money.  These were perfect. 
Master Gardeners, for those with crinkled eye brows, is a group of plant and garden enthusiast/gurus.  And yes, I did get my love of plants from Mom.  We could probably plant talk all day.
So with the deadline looming I helped her create these.  I merely cut, she sewed them up.  Rather nicely, huh?

We decided that everyone has enough reusable grocery bags so these were created a little shorter and wider.  We had the gardener in mind.  I’d totally tote this around in my garden to carry tools around and then use to haul my veggies back to the house.  Since I’ve left she’s made another 4 or 5.  She’s on a roll!
 
To finish off the trip I stopped by my aunt’s house.  She was de-stashing her stash.  I kind of feel like the American Picker Guys and totally hit the “Honey Hole”!  I probably made out with about 20 yards of truly vintage fabric.  All these pretty calicos staring back at you are from the mid 1990’s and before.  YAY!


What do you think I should sew with them?

 
I always love going home.  Good things happen there.


Wednesday, January 29, 2014

Valentine Love


A few weeks ago, I was cruising along on Pinterest killin' time and saw a Pin-tastic idea for Valentine Pillows!  (Catch my new word?) It wasn't a tutorial, just a pretty little picture.  

I think it was more Pin-tastic because I had ALL the materials in my possession.  Win-Win!  I'm on a personal mission this year to shop my closet before I shop some of my favorite fabric shops. I'm not saying I won't buy anything else but I need to control that fabric chaos!  My closet is spilling with too much cotton color!  You can probably relate right?

Since it was just a picture I didn't have any directions. I made it up as I went along. I'll give you some of the highlights to making this pillow come to life. 


Materials needed

Linen fabric or some other kind of loose weave fabric. Burlap would be super cute too!
Scissors
Fabric pen
Embroidery hoop
Tape
Ribbon or Twill
Pillow Insert or stuffing
Large needle


This is the largest needle I had. Not quite big enough to thread the ribbon and sew with it through the linen.  Might be able to use a needle on burlap though.  While I contemplated waiting to make it until I had a better needle I knew it'd probably be Easter before the pillows were finished!  So I had to improvise.


I turned the end of my ribbon into a self threader.  I wanted to create it to look like the end of a shoelace, if that helps you visualize. I covered it with tape and then cut it at a diagonal.  Using some more tape I wrapped it around the end to help the tip be more firm. 


Next I hooped my fabric and hand drew the heart I was going to stitch.  


Take your needle and poke holes in the fabric. The bigger the hole you can make the better. I found it easier to thread the ribbon through the fabric. 

Leave enough on the ends so you can tie a bow. 


Should look something like this. Take it off the hoop and sew up that pillow!  I used stuffing this time instead of an insert. This was a great idea because I enlisted my girls to help me stuff them. Instant kid craft!  Another Win-Win!


Pin-tastic turned too cute to just make one!  LOVE!  


Monday, January 13, 2014

2014 “Craft-olutions”


Can I just make up a word?  Like it? 


We all come up with the same ol’ same resolutions every New Year. 
“Lose weight, exercise, don’t eat this, don’t eat that, etc. etc.”  What an un-inspiring way to start the New Year!  We know how to create a healthy life.  It should not be a resolution but a lifestyle, right?  SO…..How about this year we get inspired to create instead!  But first we need to make a list so we don’t lose focus!  (Wink!)


I always have random, wandering thoughts of craft projects I’d like to accomplish.  I think of them one day, forget them the next, only to remember them days/weeks later.  Not this time, I’ve been brainstorming this last week, writing down all my ideas and projects hiding in my closet.


This year I will finish my craft-olutions so I can look back and smile at all the beauty I created in 2014.  This is not to say these are the only things I will do….  I’m not THAT predictable!  Haha! 


Here they are, the list that will keep me “organized” and hopefully keep you inspired.
  • Craft Room Organization – the toys and the little people are joining me this year and it’s a crash of the toy blocks and fabric right now.  I can’t handle it much longer….patiently waiting for my Ikea order… tap, tap, tap…….
  • Wood Burning projects – I have a Woodburning tool that needs the dust knocked off of it and a wedding gift I need to finish!  Eek!
  • Chalk paint – used it?  I LOVE this stuff!  There is furniture calling your name.
  • Mug Rugs – These things are as cute as they sound!
  • Quilting – I have a ton of scraps, I think another quilt is in order.
  • Mixer Cover Pattern – Mixer Covers are my one claim to fame!  Ha!  Might as well put it on paper instead of keeping it just in my head.
  • Dresses for my girls
  • Tackle a new fabric other then cotton….. Knit, maybe?!?!
  • Pearl Snaps – Love these vintage shirts.  I’ve been lucky enough to get my hands on some great ones…now I just need to figure out something fun to do with them.
  • Recover my Couch – Say WHAT?!?!?  This is really just a thought not sure I’m brave enough to tackle it right now. 
  • Vegetable Garden – I probably get more giddy and inspired walking into a plant nursery on a spring day then anything else.  Walking into a fabric store is a VERY close second though.  Winking smile
  • Pancakes – Not fabric or plants but over the last year I cannot get enough of these things.  I am open to any and all recipes!  My goal is to try a new recipe every week.  (Might not be every week because I already have some real favorites.)
Doable, right?!  I think so.  And if you know me, you know that there will be more fun things I come up with.  You’ll have to stay tuned to see the finished products and what else I come up with!


Lets make 2014 BEAUTIFUL!

Monday, January 6, 2014

2013 ends and 2014 begins…. get your scissors ready!


Let me start by saying this…… NEVER did the ball drop at 12 AM Eastern time (that’s as long as I made it okay!) and think, “I’m gonna start a blog this year.”  Been there done that, but then my cousin, Emilee, over at the bird and the bicycle, challenged me on my Facebook page and I was game!?!?   Really?  I’m easily persuaded, okay!
Just know that I don’t do technology, though.  Tried a blog a few years ago and failed miserably!  (Confession:  I just turned in my Samsung Galaxy and returned to the iPhone because of failed attempts to understand the technology.  Or maybe it was the fact that that phone had WAY too many options for this girl to grasp.)  Also, didn’t know that there were blog writers and apps out there to make the blog life simpler.  So truthfully my cousin set everything up for me and gave some very helpful pointers to getting started.  How could I turn that offer down, right?!  Thanks Emilee!
So here we are with helping hands and surrounded by fabric.  Let me show you 2013 in a few pictures before I start plowing into 2014.
 20130124_163326
20130102_171445

20130612_13510220130705_140637
20130813_205702


20130804_09231220131031_17515720131030_17262820131117_13240220131212_214251
20131216_172518IMG_20131213_07244520131224_154702
These were just some of the highlights…..Wow, kind of makes me look like I’ve been busy this last year!  2013, thanks for a great year.  Sewing machine's start your engine, 2014 is going to give us a run for our fabric!
There are so many sewing/craft projects I can’t wait to tackle….. just need to figure out where to start first. 
(In my next post I’ll lay out my tentative 2014 road map through fabric, scissors, paint and flowers.  Eek!  So excited!)

Wednesday, January 1, 2014

New Adventures in blogging!

Happy 2014!

Hope to record all my sewing adventures here!  Most recently, I took on a new project for my girls.  I'm pretty thrilled with the result!